
How to Show Only Selected Variant Images Shopify (Two Methods)
To show only selected variant images in Shopify, group variant photos together in your product media gallery and set primary images for each variant. Alternatively, use an app like Echo Swatch to auto-assign and filter images automatically.
Clean product galleries help shoppers make quick decisions. Hence, learn how to show only selected variant images Shopify and hide irrelevant photos when customers click a color or size.
You may know that unmatched images confuse buyers and hurt your conversion rates. A neat layout solves this issue right away.
That said, this guide covers two simple methods. You’ll see how to organize media with native Shopify settings or automate the process using an AI app.
Method 1: Show Selected Variant Images with Shopify’s Native Settings
Shopify uses a variant’s assigned image alongside Shopify color swatches to show specific photos when shoppers click an option.
If you want to know how to show variant image in Shopify without extra apps, follow these steps in your store admin:
Organize Product Images for Variant Filtering
Before you begin, ensure:
- Every color or model has dedicated photos.
- All files sit inside your Shopify product media gallery.
Prepare Images for Each Variant
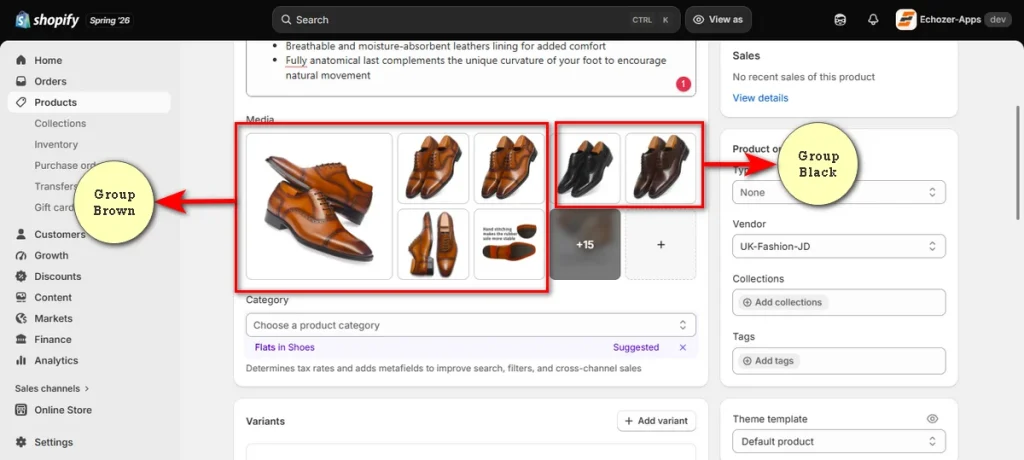
In your Shopify Products admin, drag your photos to group every image for a specific variant side by side.
Example:
Brown 1 → Brown 2 → Brown 3
Dark Brown 1 → Dark Brown 2 → Dark Brown 3
Black 1 → Black 2 → Black 3
Set Color as the Primary Variant Option
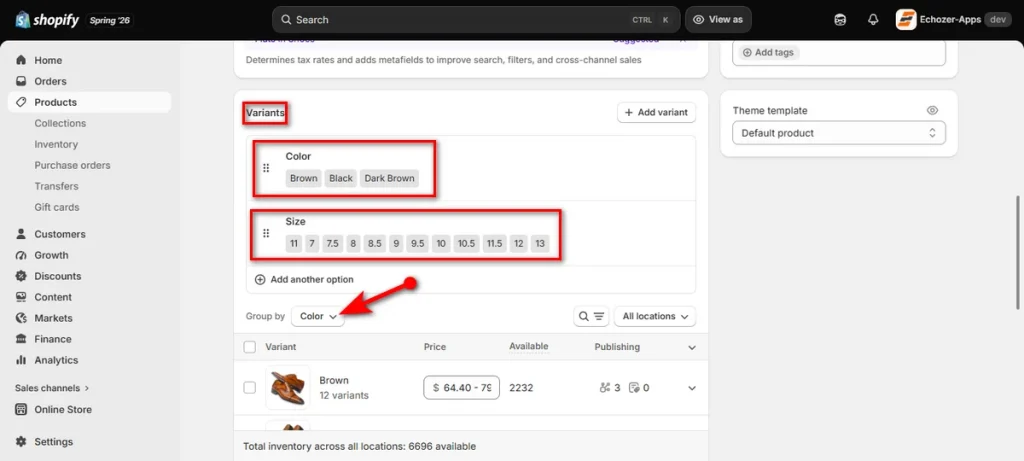
Scroll down to the ‘Variants’ section after grouping your photos. Drag the color or visual option straight to the top of your list. Lastly, select ‘Color’ from the “Group by” dropdown menu.
Set the Image for the Primary Variant Option
Now, you need to add an image to each primary variant option. While assigning images, ensure that the image you choose for each primary variant option is the first image of its image group.
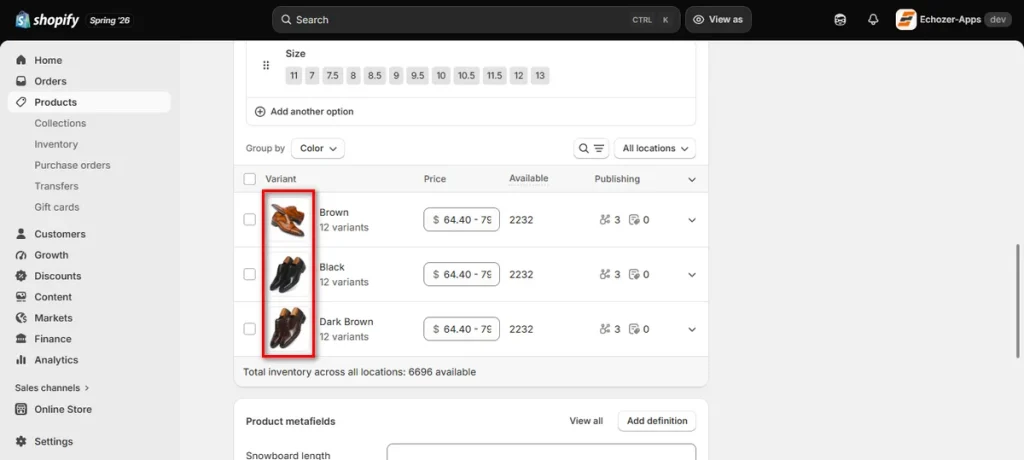
Choose the Main Image for Each Variant
Click the down arrow icon of a variant and start adding image for each variant option. For each variant, select the first image from its corresponding image group as the variant’s main image.
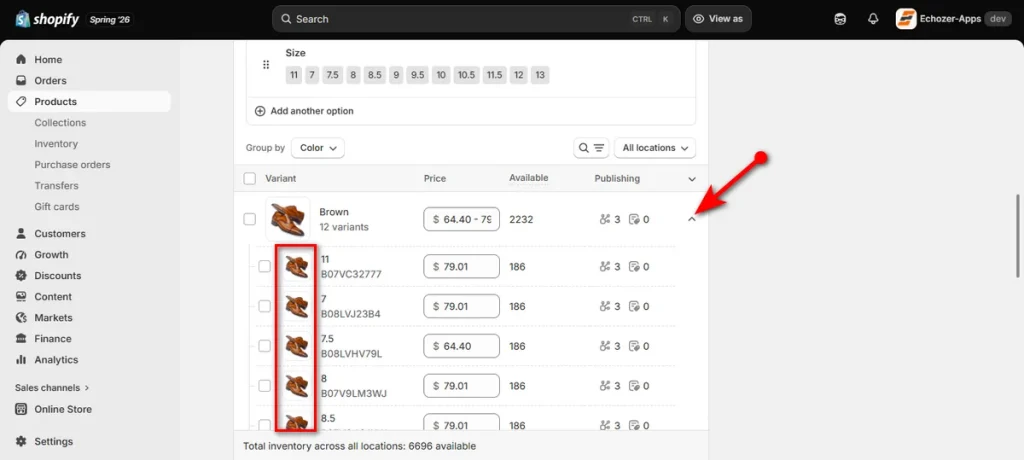
Now, repeat the same steps to add images to the other variants. Once you’re done, click the ‘Save’ button.
Open a product page on your store and click any swatch. The gallery now displays photos for that specific variant only.
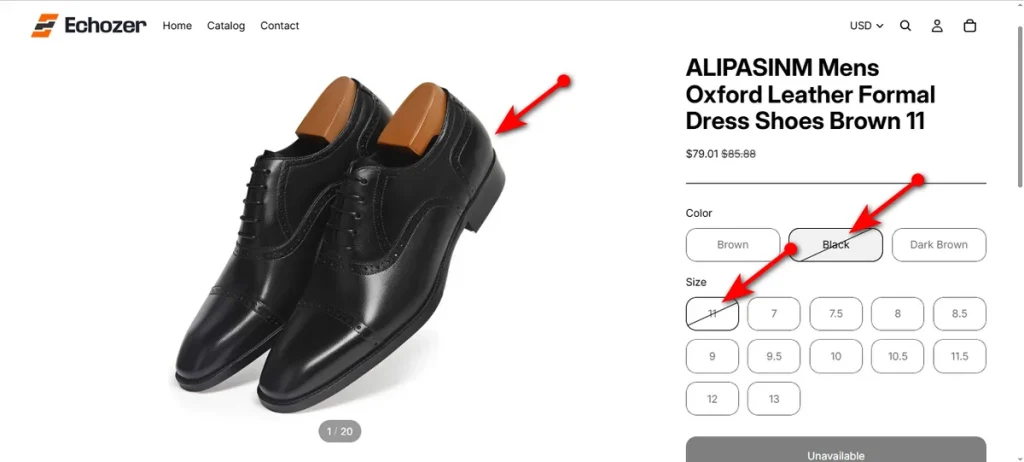
Method 2: Use Echo Swatch to Filter Variant Images
Echo Swatch is a dedicated Shopify variant images app that eliminates repetitive drag-and-drop work.
This app sets up Shopify multiple variant images in less than 5 minutes, making it one of the best variant size Shopify apps for store owners.
Here is how to configure this easy variant images setup without manual mapping:
Install Echo Swatch
Find Echo Swatch on the Shopify App Store and install the app. Open Echo Swatch directly from your Shopify ‘Apps’ dashboard.
Configure Your Preferred Product
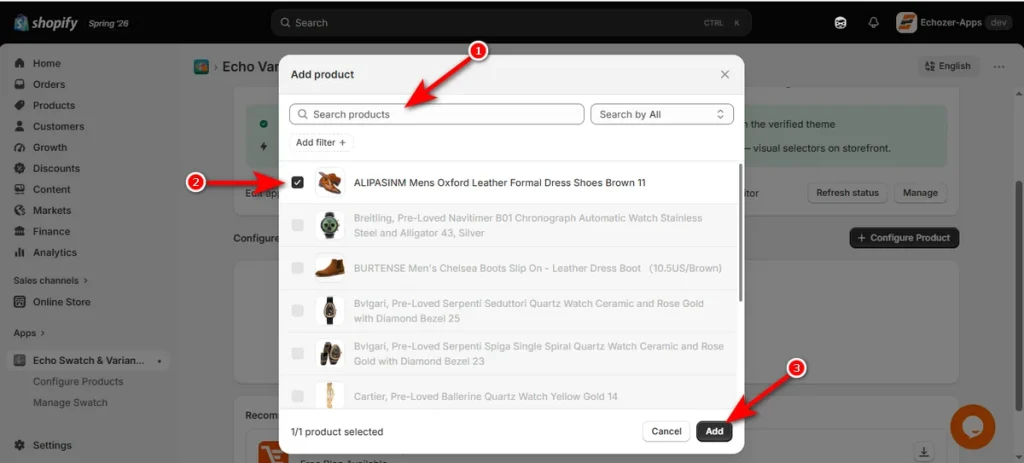
Click the “+ Configure Products” button on the left menu.
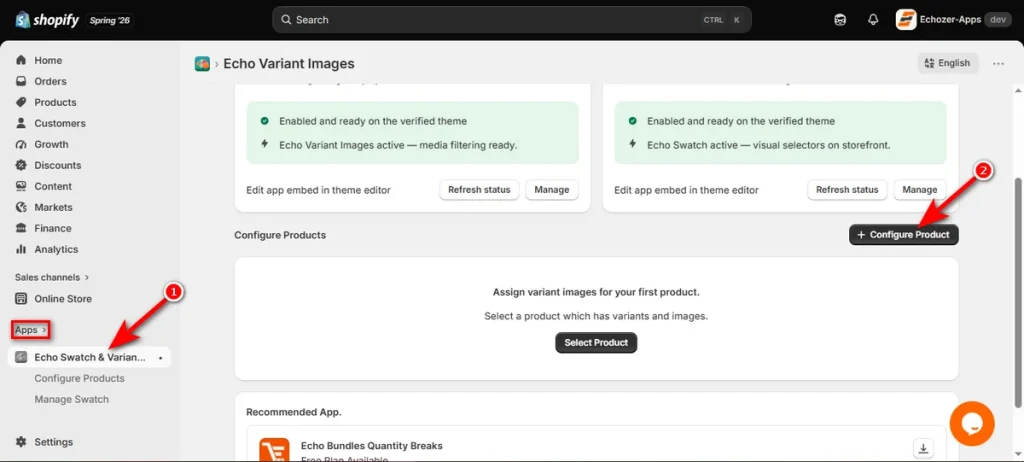
Search for your item in the pop-up search bar. Check the box next to your product name, then click Add.
Automatically Assign Images With AI
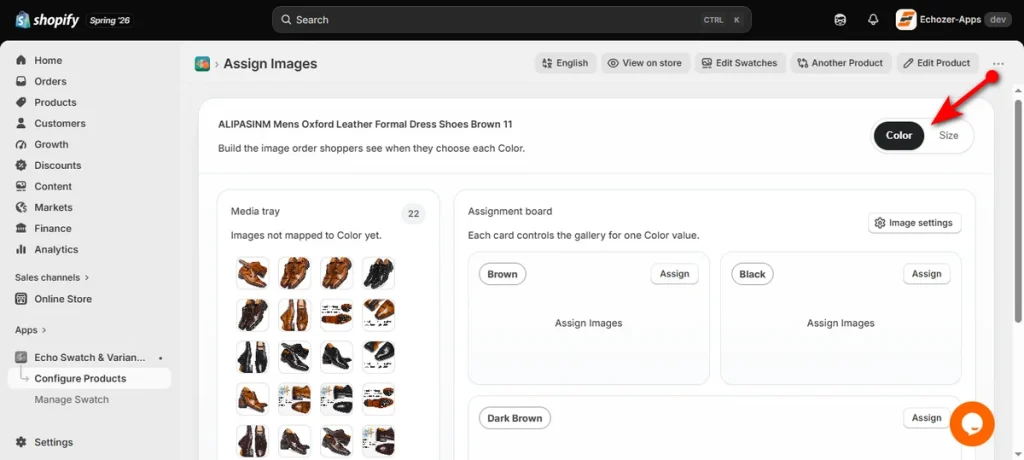
Pick your target option tab, such as Color or Size, at the top right.
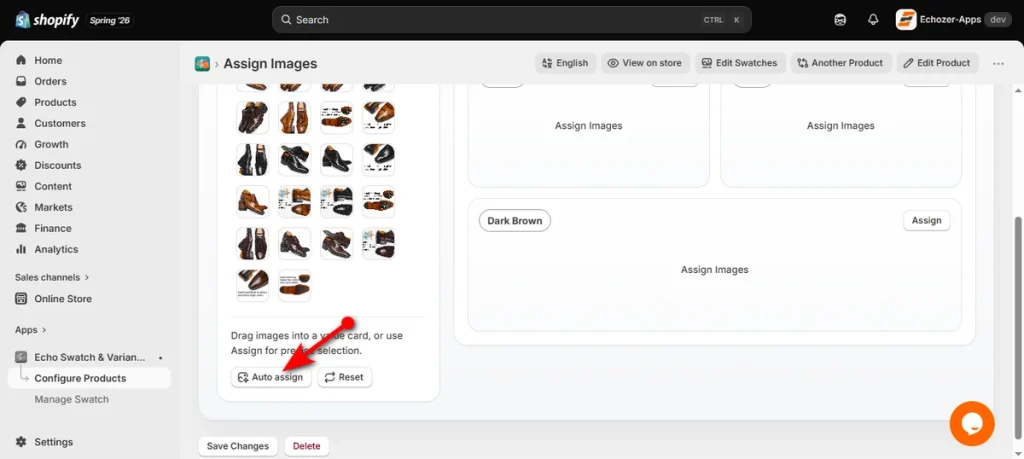
Now, click the “Auto assign” button under the “Media tray.”
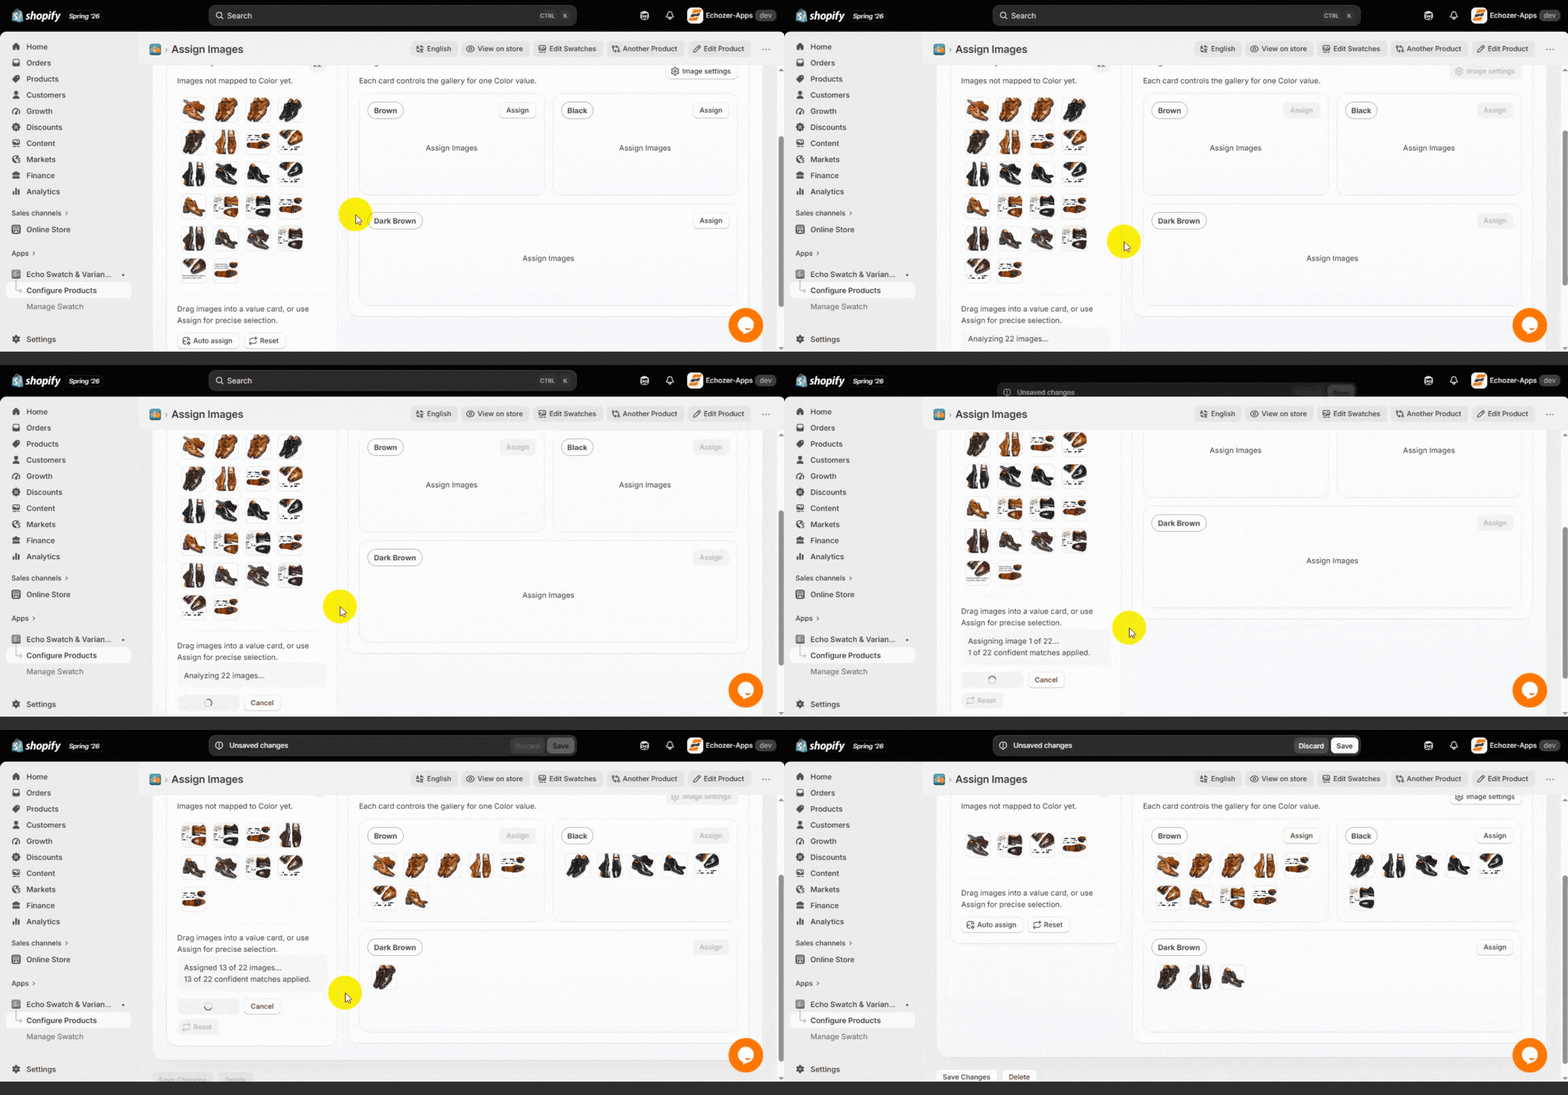
Let the app scan your gallery files using AI and link photos to option cards.
Display the Relevant Images When a Variant Is Selected
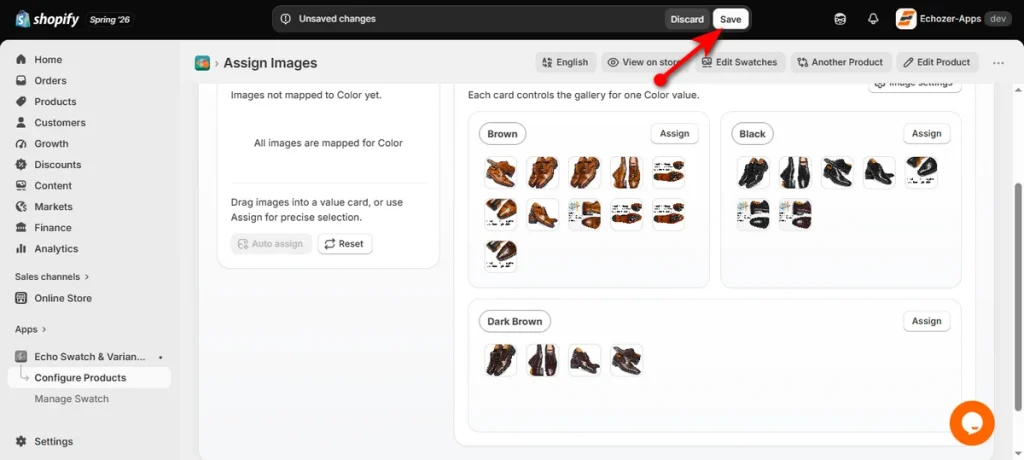
Check the AI assignments carefully on each option card. Drag any missed files from the “Media tray” straight into their correct option cards.
Then, tap ‘Save’ at the top right of your bar.
Click “View on store” to test variant pairs and confirm unrelated photos stay hidden.
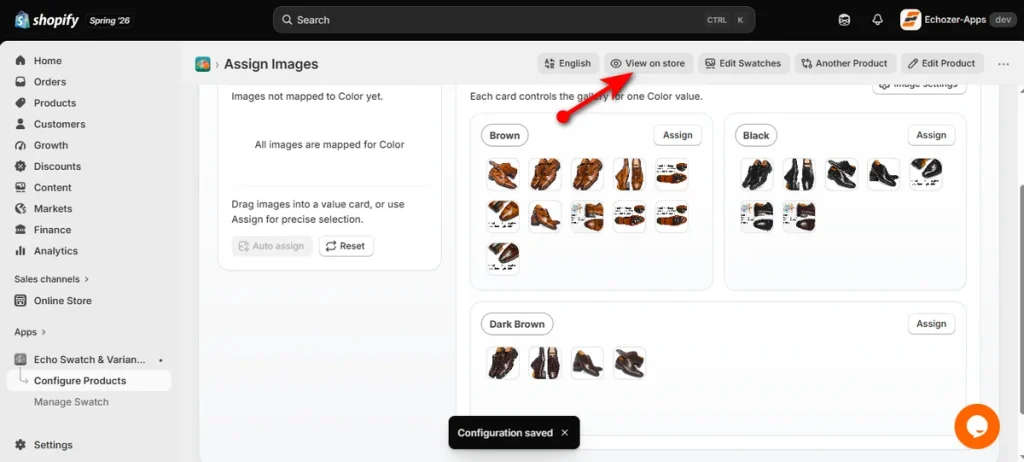
Now, your Shopify store will show only selected variant images for variant products.
Native Shopify Setup vs. Echo Swatch
Both methods filter media effectively, yet each fits different store sizes and workflow needs.
| Feature | Native Shopify Setup | Echo Swatch App |
| Setup Time | Slow (manual grouping for every product) | Fast (instant AI auto-assignment) |
| Cost | Free (built into your theme) | Free (3 products and AI auto-assignment for 50 images monthly) |
| Ease of Use | High manual drag-and-drop effort | One-click auto-mapping |
| Visual Customization | Standard drop-downs, custom product options, or basic theme swatches | Advanced color, pattern, and image swatches |
| Best For | Small catalogs with few variants | Large stores with complex, multi-option products |
Native setup works great if you run a small catalog and want a zero-cost solution. Echo Swatch saves hours of repetitive labor when managing dozens of products with multiple colors, sizes, or materials.
Summing Up
Now you know how to show only selected variant images Shopify. You can follow either of these two methods discussed in this content.
Both methods hide extra pictures so customers see what they want. Pick whichever path fits your catalog size and test it today.
If you ask for a recommendation, I would suggest you go with the second method as it’s fast and hassle-free.
FAQs
How Do I Stop Shopify Showing Variants as Main Image?
Change your main product photo in the ‘Media’ section. Unlink specific photos from individual variants so Shopify defaults to your primary featured image on collection pages.
How Do I Show Variants as Separate Products on Shopify?
Use an app, edit theme code, or manually duplicate products in Shopify admin to display each variant as a separate listing.
How to Hide Unavailable Variants in Shopify?
Shopify lacks a built-in setting to hide sold-out variants. You must install a third-party app, edit your theme code, or delete the unavailable options manually.